Red White and Blue Marble Cake Recipe: Easy Layered Cake
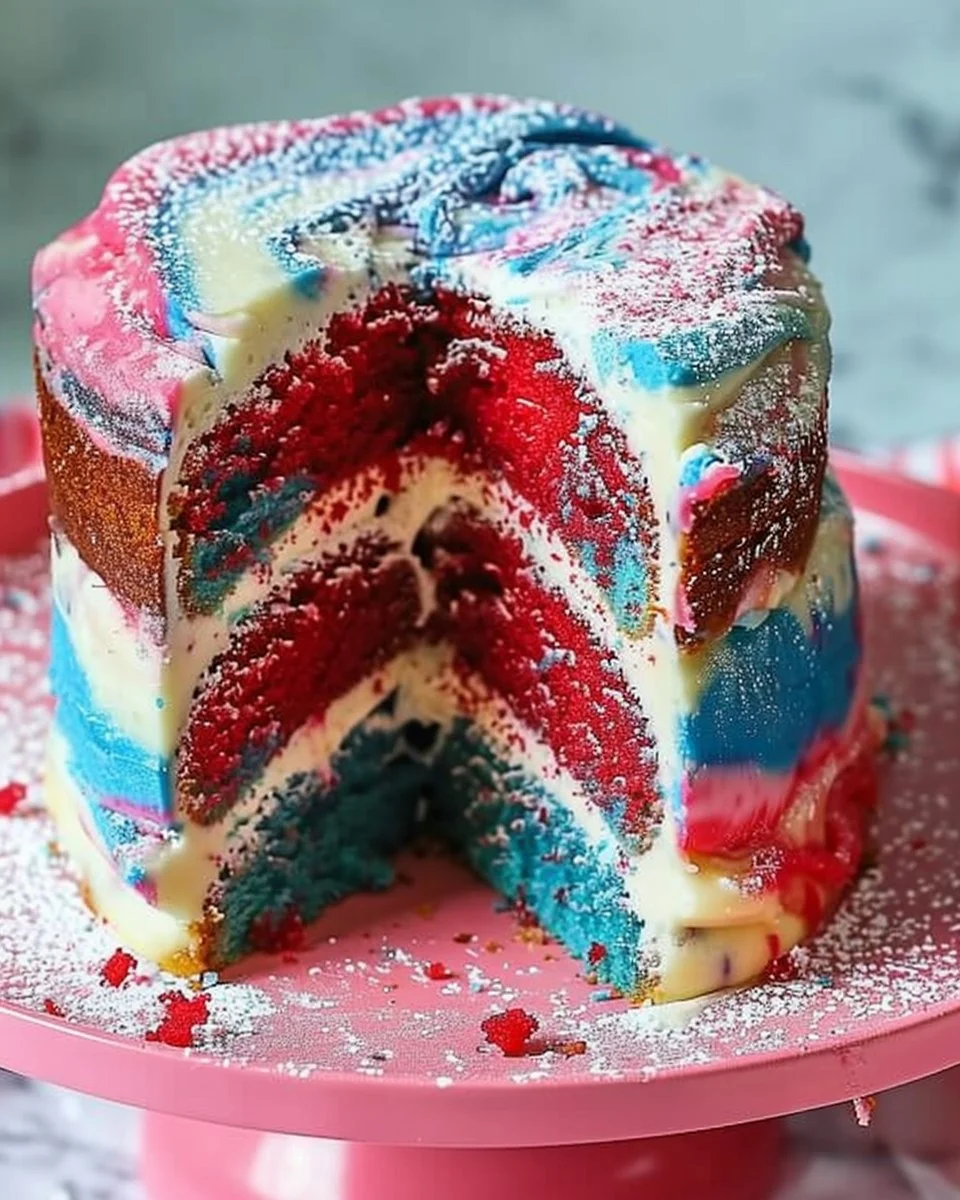
Looking for a showstopper dessert that embodies the spirit of celebration? The Red, White, and Blue Marble Cake is not only visually striking but also a delicious treat that can brighten any occasion—be it a summer barbecue, a festive gathering, or a patriotic holiday. This cake satisfies the eyes and the taste buds, with vibrant colors and rich flavors that beckon you for another slice.
This delightful cake is marbled with red and blue hues, representing patriotic themes, while the fluffy white base ties it all together. In this article, I’ll walk you through everything you need to know about creating this stunning confection. So grab your mixing bowls, and let’s dive into the world of colorful baking.
What Is the Red, White, and Blue Marble Cake?
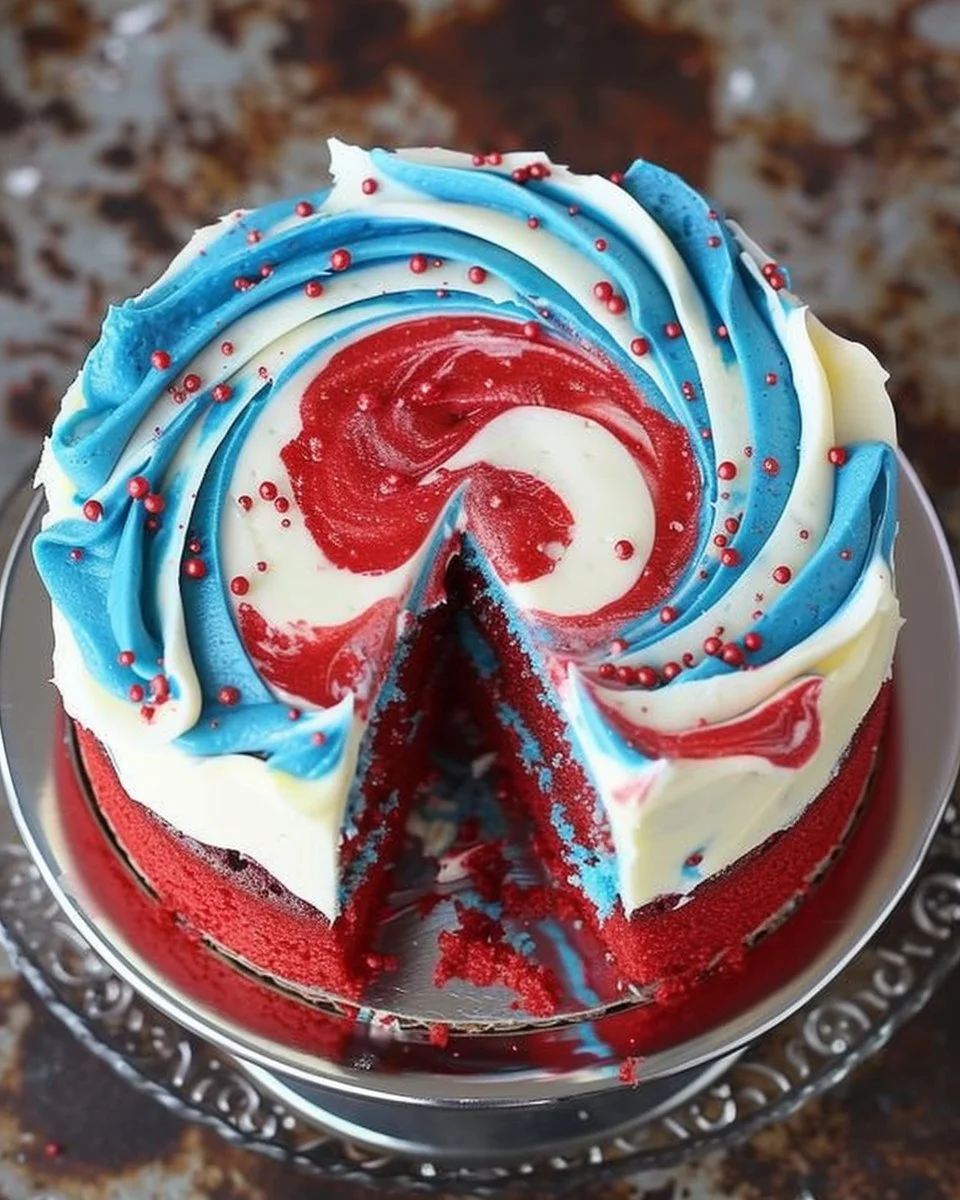
The Red, White, and Blue Marble Cake is a layered cake that combines vibrant red and blue batters with a classic vanilla or white cake base to create an eye-catching marbled effect. This cake is perfect for celebrations, especially around the Fourth of July, Memorial Day, or any time you feel the patriotic spirit. It’s not just about the looks; every layer is packed with flavor, ensuring that each bite is as enjoyable as it is beautiful.
Why You’ll Love It
- Visual Appeal: With its striking colors, this cake is a feast for the eyes and an Instagram-worthy creation.
- Versatile Flavor: The combination of vanilla, red, and blue cake batters creates a delightful taste experience that’s both sweet and satisfying.
- Perfect for Any Occasion: Whether you’re celebrating a holiday, a birthday, or just the joy of baking, this cake fits right in.
Ingredients

To make the Red, White, and Blue Marble Cake, you’ll need the following ingredients:
- For the White Base:
- 2 ½ cups all-purpose flour
- 1 ½ cups granulated sugar
- ½ cup unsalted butter, softened
- 1 cup milk
- 3 large eggs
- 1 tablespoon baking powder
- 1 teaspoon vanilla extract
- ½ teaspoon salt
- For the Colored Batters:
- Red gel food coloring
- Blue gel food coloring
- For the Frosting (Optional):
- 1 cup unsalted butter, softened
- 4 cups powdered sugar
- 2 tablespoons heavy cream
- 1 teaspoon vanilla extract
Step-by-Step Instructions
Step 1: Preheat the Oven
Start by preheating your oven to 350°F (175°C). Grease and flour three 8-inch round cake pans to ensure easy removal after baking.
Step 2: Make the Cake Batter
- In a large mixing bowl, cream together the softened butter and granulated sugar until light and fluffy.
- Add the eggs one at a time, mixing well after each addition. Then stir in the vanilla extract.
- In another bowl, whisk together the flour, baking powder, and salt.
- Gradually add the dry ingredients to the wet mixture, alternating with the milk. Mix until just combined.
Step 3: Divide and Color the Batter
Divide the batter into three equal portions in separate bowls.
- Leave one portion uncolored (the white base).
- In the second bowl, add red gel food coloring until you achieve your desired shade. Repeat in the third bowl with blue gel food coloring.
Step 4: Create the Marble Effect
- Using a spoon or spatula, drop spoonfuls of each color into the prepared pans, alternating colors.
- Using a knife or skewer, swirl the batters together gently, creating a marbled effect. Be careful not to over-mix; you still want to see the colors.
Step 5: Bake
Place the pans in the oven and bake for 25-30 minutes or until a toothpick inserted in the center comes out clean.
Step 6: Cool and Frost
- Once baked, let the cakes cool in the pans for about 10 minutes, then transfer them to a wire rack to cool completely.
- For the frosting, beat together the softened butter, powdered sugar, heavy cream, and vanilla extract until smooth and creamy.
- Once the cakes are completely cool, spread frosting between the layers and on top and sides of the cake.
Helpful Tips
- Food Coloring: Gel food coloring provides more vibrant colors without altering the batter’s consistency. Start with a small amount and adjust as needed.
- Baking Time: Always check your cakes a few minutes before the recommended time to avoid overbaking.
- Frosting: If you want a pop of color in your frosting too, consider using a small amount of gel food coloring.
Variations
Feel free to experiment! Here are a few ways to make this cake your own:
- Flavor Variations: Add almond extract for a different flavor profile, or incorporate lemon zest for a refreshing twist.
- Filling Options: Consider layering the cake with raspberry or blueberry jam for added flavor.
- Toppings: Top with fresh berries or edible glitter for an extra festive touch.
Serving Ideas
The Red, White, and Blue Marble Cake is delightful on its own, but here are some serving suggestions:
- Serve with a scoop of vanilla ice cream for an indulgent dessert.
- Pair it with whipped cream and fresh berries for a delightful British-inspired dessert.
- Cut it into fun shapes using cookie cutters for a playful presentation.
Storage Tips
- Cover the cake with plastic wrap or store it in an airtight container. It can be kept at room temperature for up to three days or in the refrigerator for up to a week.
- If you want to store it long-term, consider freezing the unfrosted layers. Wrap them tightly in plastic wrap and place them in a freezer-safe bag. They will last for up to three months. Just thaw before frosting and serving.
Common Mistakes
- Overmixing the Batter: This can lead to a dense cake. Remember to mix until just combined.
- Not Using Enough Food Coloring: For vibrant colors, don’t be shy with the gel food coloring!
- Skipping the Cooling Time: Frosting a warm cake can lead to melting frosting and a messy presentation.
Health or Nutrition Information
While the Red, White, and Blue Marble Cake is not a health food, it is a delightful treat you can enjoy in moderation. If you’re looking to cut down on sugar, consider substituting with a sugar alternative, but these changes can impact texture and flavor.
Expert Insights
The magic of this cake lies not just in its appearance, but also in the nostalgia it evokes during gatherings and celebrations. Don’t hesitate to get the kids involved in the swirling process for fun family bonding. Baking is as much about the experience as it is about the final product.
FAQs
What is a Red, White, and Blue Marble Cake?
The Red, White, and Blue Marble Cake is a colorful dessert showcasing red and blue batters marbled with a vanilla base, perfect for patriotic holidays.
Can I make this cake ahead of time?
Yes! You can bake the layers a day in advance and store them wrapped in the fridge. Frost them on the day you want to serve.
How do I make the colors stand out more?
Using gel food coloring will give you richer colors compared to liquid dyes. Don’t be afraid to use a bit more until you achieve your desired saturation.
What should I do with leftover cake?
Store leftover cake in an airtight container at room temperature for up to three days, or freeze leftover slices for up to three months.
Can I use different colors for the cake?
Absolutely! You can customize the cake with any colors you like, making it suitable for various themes and celebrations.
What’s the best way to frost a marble cake?
Ensure the cake is completely cool before frosting. Use a crumb coat first to prevent crumbs from getting in the frosting, then add a final layer for a beautiful finish.
In conclusion, the Red, White, and Blue Marble Cake is more than just a dessert; it’s a celebration in every slice. With its vibrant colors, delicious flavors, and versatile nature, this cake will surely bring joy to your gatherings and create lasting memories around the table. So, don your apron, gather your ingredients, and let the baking adventures begin!
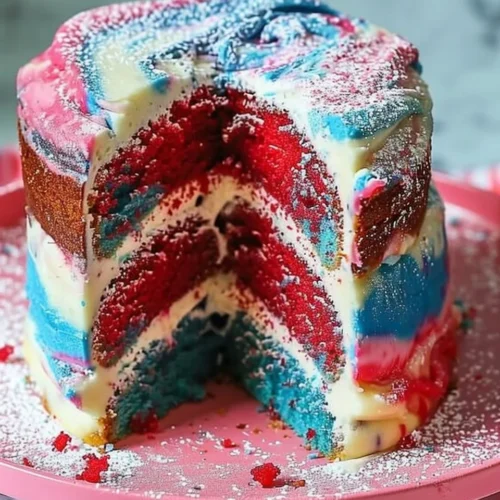
Red, White, and Blue Marble Cake
Ingredients
For the White Base
- 2.5 cups all-purpose flour
- 1.5 cups granulated sugar
- 0.5 cups unsalted butter, softened
- 1 cup milk
- 3 large eggs
- 1 tablespoon baking powder
- 1 teaspoon vanilla extract
- 0.5 teaspoon salt
For the Colored Batters
- Red gel food coloring
- Blue gel food coloring
For the Frosting (Optional)
- 1 cup unsalted butter, softened
- 4 cups powdered sugar
- 2 tablespoons heavy cream
- 1 teaspoon vanilla extract
Instructions
Preparation
- Preheat the oven to 350°F (175°C). Grease and flour three 8-inch round cake pans.
- In a large mixing bowl, cream together the softened butter and granulated sugar until light and fluffy.
- Add the eggs one at a time, mixing well after each addition, then stir in the vanilla extract.
- In another bowl, whisk together the flour, baking powder, and salt.
- Gradually add the dry ingredients to the wet mixture, alternating with the milk. Mix until just combined.
Coloring the Batter
- Divide the batter into three equal portions in separate bowls.
- Leave one portion uncolored, then add red gel food coloring to the second bowl until the desired shade is achieved, and repeat with blue gel food coloring in the third bowl.
Creating the Marble Effect
- Drop spoonfuls of each color into the prepared pans, alternating colors.
- Using a knife or skewer, swirl the batters together gently to create a marbled effect.
Baking
- Place the pans in the oven and bake for 25-30 minutes or until a toothpick inserted in the center comes out clean.
Cooling and Frosting
- Let the cakes cool in the pans for about 10 minutes, then transfer them to a wire rack to cool completely.
- For the frosting, beat the softened butter, powdered sugar, heavy cream, and vanilla extract until smooth and creamy.
- Spread frosting between the layers and on the top and sides of the cake once the cakes are completely cool.